Table of Contents
We understand the critical role that control valve stem packing plays in ensuring the seamless operation of industrial valves. The Replacement Procedure for Control Valve Stem Packing is a crucial aspect of maintenance to guarantee optimal performance and prevent leaks. In this comprehensive guide, we’ll walk you through the intricacies of control valve gland packing replacement, providing detailed insights to help you maintain your equipment with precision.
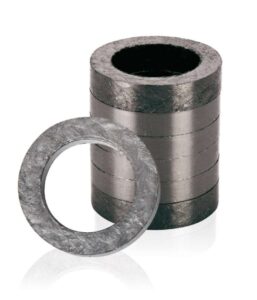
Understanding Control Valve Stem Packing
Control Valve Stem Packing Essentials
Control valve stem packing is a vital component that prevents the leakage of process fluids from the valve. It acts as a barrier, ensuring a tight seal around the valve stem, thus preventing any undesired leaks. Regular wear and tear can compromise the efficiency of the packing, making periodic replacement essential.
Signs of Deteriorating Stem Packing
Identifying the signs of deteriorating control valve stem packing is crucial for timely replacement. Look out for leaks, reduced valve efficiency, or visible wear on the packing material. Addressing these issues promptly ensures the longevity and reliability of your control valves.
The Replacement Procedure
Step 1: Safety First
Before embarking on the replacement procedure, prioritize safety. Ensure that the equipment is properly isolated, and all necessary safety protocols are followed. This includes shutting off the valve, depressurizing the system, and using appropriate personal protective equipment (PPE).
Step 2: Valve Disassembly
Begin by carefully disassembling the control valve. Remove the actuator, bonnet, and any additional components to access the stem packing. Take note of the existing packing arrangement for reference during reassembly.
Step 3: Removing the Old Packing
Gently extract the old stem packing, paying close attention to any residues or debris. Thoroughly clean the packing area to ensure a pristine surface for the new packing installation.
Step 4: Selecting the Right Packing Material
Choosing the appropriate packing material is paramount for optimal performance. Factors such as temperature, pressure, and the nature of the process fluid must be considered.
Step 5: Installing the New Packing
With the correct packing material selected, carefully install the new stem packing. Follow the manufacturer’s guidelines and ensure a snug fit. Proper packing installation is fundamental to preventing leaks and ensuring the longevity of the valve.
Step 6: Reassembling the Valve
Once the new packing is securely in place, proceed to reassemble the control valve. Pay attention to the correct alignment of components and follow the disassembly notes made earlier. Tighten all bolts to the recommended torque specifications.
Quality Assurance and Testing
Post-Installation Checks
After completing the replacement procedure, conduct thorough quality checks. Ensure that all components are correctly reassembled, and there are no loose fittings. Perform a leak test to verify the effectiveness of the new stem packing.
Operational Testing
To guarantee peak performance, conduct operational tests on the control valve. This includes checking for smooth operation, proper response to control signals, and overall system integrity.
Conclusion
This comprehensive guide on the Replacement Procedure for Control Valve Stem Packing underscores our commitment to providing valuable insights for optimal industrial equipment performance. By following these detailed steps, you can ensure the longevity and efficiency of your control valves.
Read Also